
- CentOS 7
- 10 GB RAM
- 5 GB Free Space on /opt/Zimbra
- 10 GB free disk space on /opt
- 10 GB free disk space on /tmp
- Fully Qualified Domain Name (FQDN), in this demo is “mail.ibtechpa.local”
- Record A & MX for your Server
- The firewall should be disabled
Become the root user:
# sudo su -
or# su -
Apply the latest updates using following command and then reboot:
# reboot
Install Zimbra dependencies:
# yum install unzip net-tools sysstat libaio nmap-ncat libstdc++.so.6 openssh-clients perl-core wget libreoffice libreoffice-headless -y
Set the hostname of your server:
# hostnamectl set-hostname mail.ibtechpa.com
# exec bash
Edit hosts file:
# vi /etc/hosts
Add:
192.168.1.141 mail.ibtechpa.com mail
# cat /etc/hosts
127.0.0.1 localhost localhost.localdomain localhost4 localhost4.localdomain4
::1 localhost localhost.localdomain localhost6 localhost6.localdomain6
192.168.1.141 mail.ibtechpa.com mail
Zimbra recommends the firewall to be disabled:
# systemctl stop firewalld
# systemctl disable firewalld
In CentOS 7, postfix is installed and running by default. So, we need to disable it for Zimbra installation:
# systemctl stop postfix
# systemctl disable postfix
Create Zimbra directory to place the installer:
# mkdir /zimbra
# cd /zimbra
Download the Zimbra 8.8.12_GA:
# wget https://files.zimbra.com/downloads/8.8.12_GA/zcs-8.8.12_GA_3794.RHEL7_64.20190329045002.tgz
Extract the downloaded file:
# tar -zxvf zcs-8.8.12_GA_3794.RHEL7_64.20190329045002.tgz
Go to extracted folder and run the install script:
# cd zcs-8.8.12_GA_3794.RHEL7_64.20190329045002
[root@mail zcs-8.8.12_GA_3794.RHEL7_64.20190329045002]#
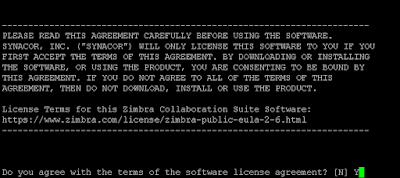
# ./install.sh
You will get text-based installation wizard. Press Y to accept the Zimbra license agreement:

Press "Y" to all Zimbra Components to install.
Pres "Y" to continue to download the Zimbra related packages. This task can take time depending upon on your internet speed.


Once all the Zimbra packages are download and installed, we will get the below window.
Enter the domain name for Zimbra installation.
In this case "ibtechpa.com"

You will get text-based installation wizard. Press Y to accept the Zimbra license agreement:

Configure the Zimbra package repository:

Press "Y" to all Zimbra Components to install.
Pres "Y" to continue to download the Zimbra related packages. This task can take time depending upon on your internet speed.


Once all the Zimbra packages are download and installed, we will get the below window.
Enter the domain name for Zimbra installation.
In this case "ibtechpa.com"

Now we need to set the Zimbra admin password:
Press 7 and them 4.


Set Password, Press enter, and press "r" to return.


Logging in to cli and check services:
[root@mail ~]# su - zimbra
Last login: Fri May 24 17:10:48 EST 2019 on pts/0
[zimbra@mail ~]$
[zimbra@mail ~]$ zmcontrol status
Host mail.ibtechpa.com
amavis Running
antispam Running
antivirus Running
dnscache Running
ldap Running
logger Running
mailbox Running
memcached Running
mta Running
opendkim Running
proxy Running
service webapp Running
snmp Running
spell Running
stats Running
zimbra webapp Running
zimbraAdmin webapp Running
zimlet webapp Running
zmconfigd Running
[zimbra@mail ~]$
Check Version:
[zimbra@mail ~]$ zmcontrol -v
Release 8.8.12_GA_3794.RHEL7_64_20190329045002 RHEL7_64 FOSS edition, Patch 8.8.12_P1 proxy.
[zimbra@mail ~]$
Users -> URL – https://mail.ibtechpa.com
Admin URL – https://mail.ibtechpa.com:7071/


Test success!!!

how to access web client from internet side?
ResponderEliminarHi NewbieTua --
EliminarOpen the ports in firewall
Check this link.
https://wiki.zimbra.com/wiki/Ports
and use https://yourip
Eliminarbut you can configure to use both http/https
#su - zimbra
#zmprov ms `zmhostname` zimbraReverseProxyMailMode redirect
#zmproxyctl restart